Setting Up Communication Between Teamogy and KSeF
Certificate Preparation and Required Credentials – KSeF
To configure communication between Teamogy and KSeF, the client must have the following access credentials and certificates prepared in advance:
- Private key
- Password
- KSeF certificate
These materials must be available for a specific company and for the specific environment in which invoice transmission will be configured:
- Production environment, or
- Pre-production (test) environment of the client.
All the above-mentioned materials are obtained by the client through the official portal of the Polish tax administration (KSeF):
https://ksef.podatki.gov.pl/informacje-ogolne-ksef-20/certyfikaty-ksef/
- Creating a Programmatic User in Teamogy (click to read more)
- Enabling API and Generating an API Key (click to read more)
- Configuring technical communication between Teamogy and KSeF – see details below
- Configuration of receiving invoices from KSeF
- Configuration of sending invoices to KSeF
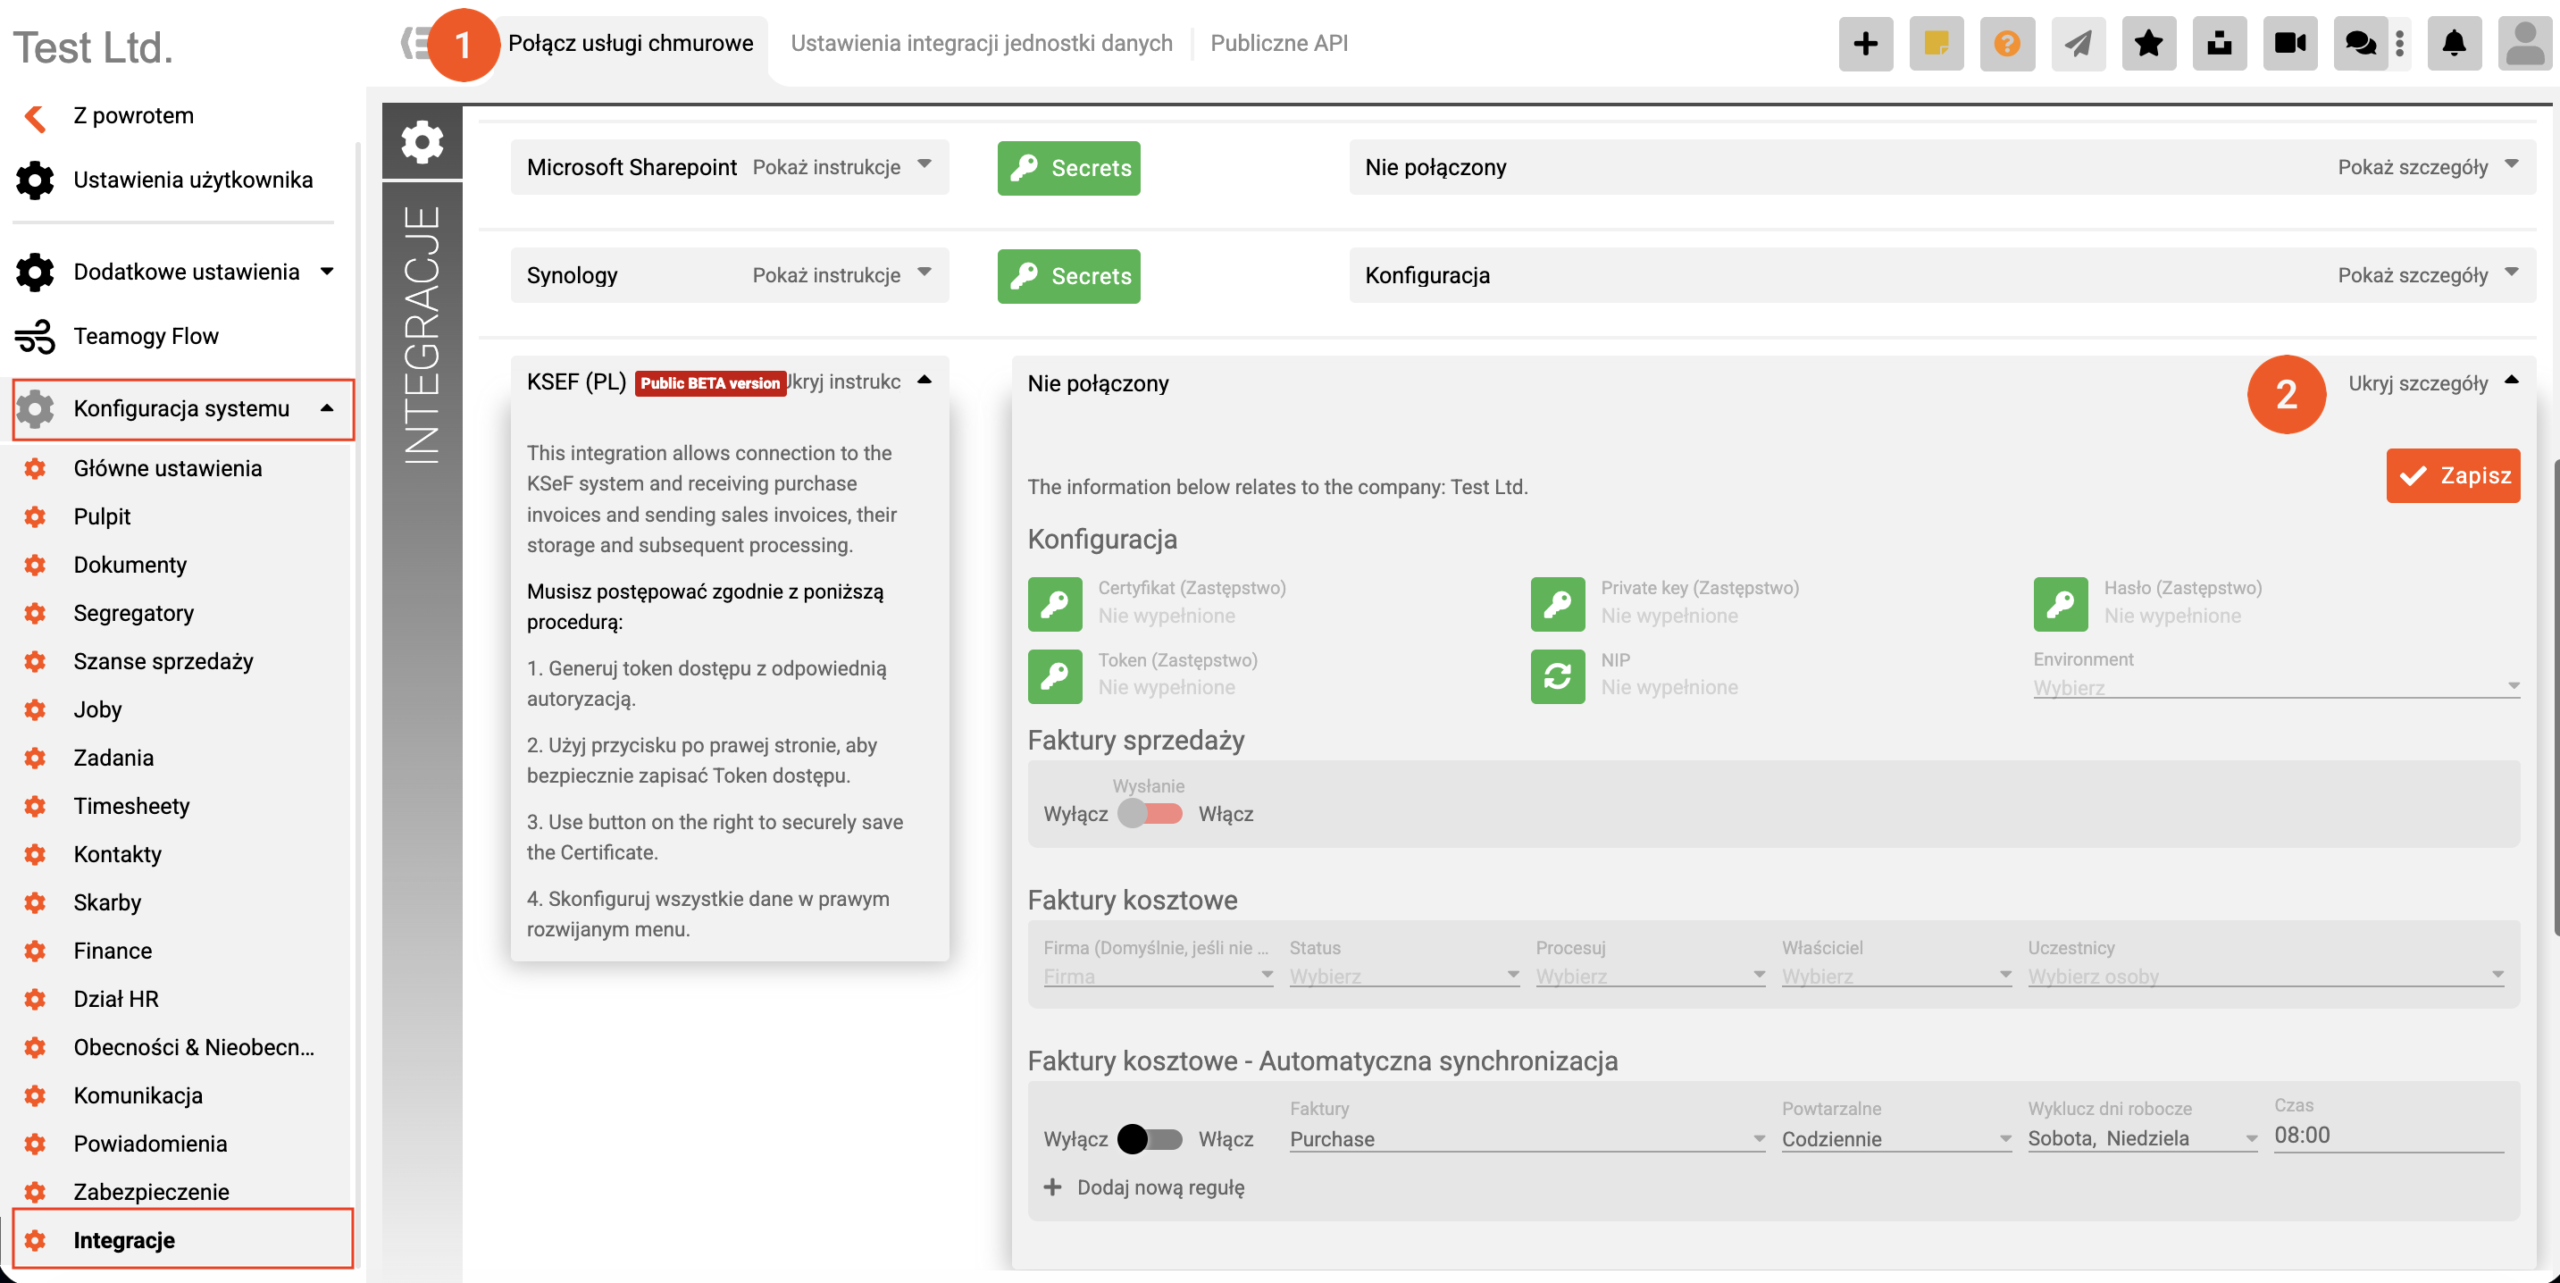
You can now proceed with the configuration of communication between Teamogy and KSeF.
The configuration settings are located in:
Configuration → System Configuration → Integrations
To configure the integration in Teamogy, all required data must be prepared in advance (Certificate, Private Key, Password, API Key), and the user must have Configurator permissions.
We recommend performing the configuration while logged in as a Programmatic User.
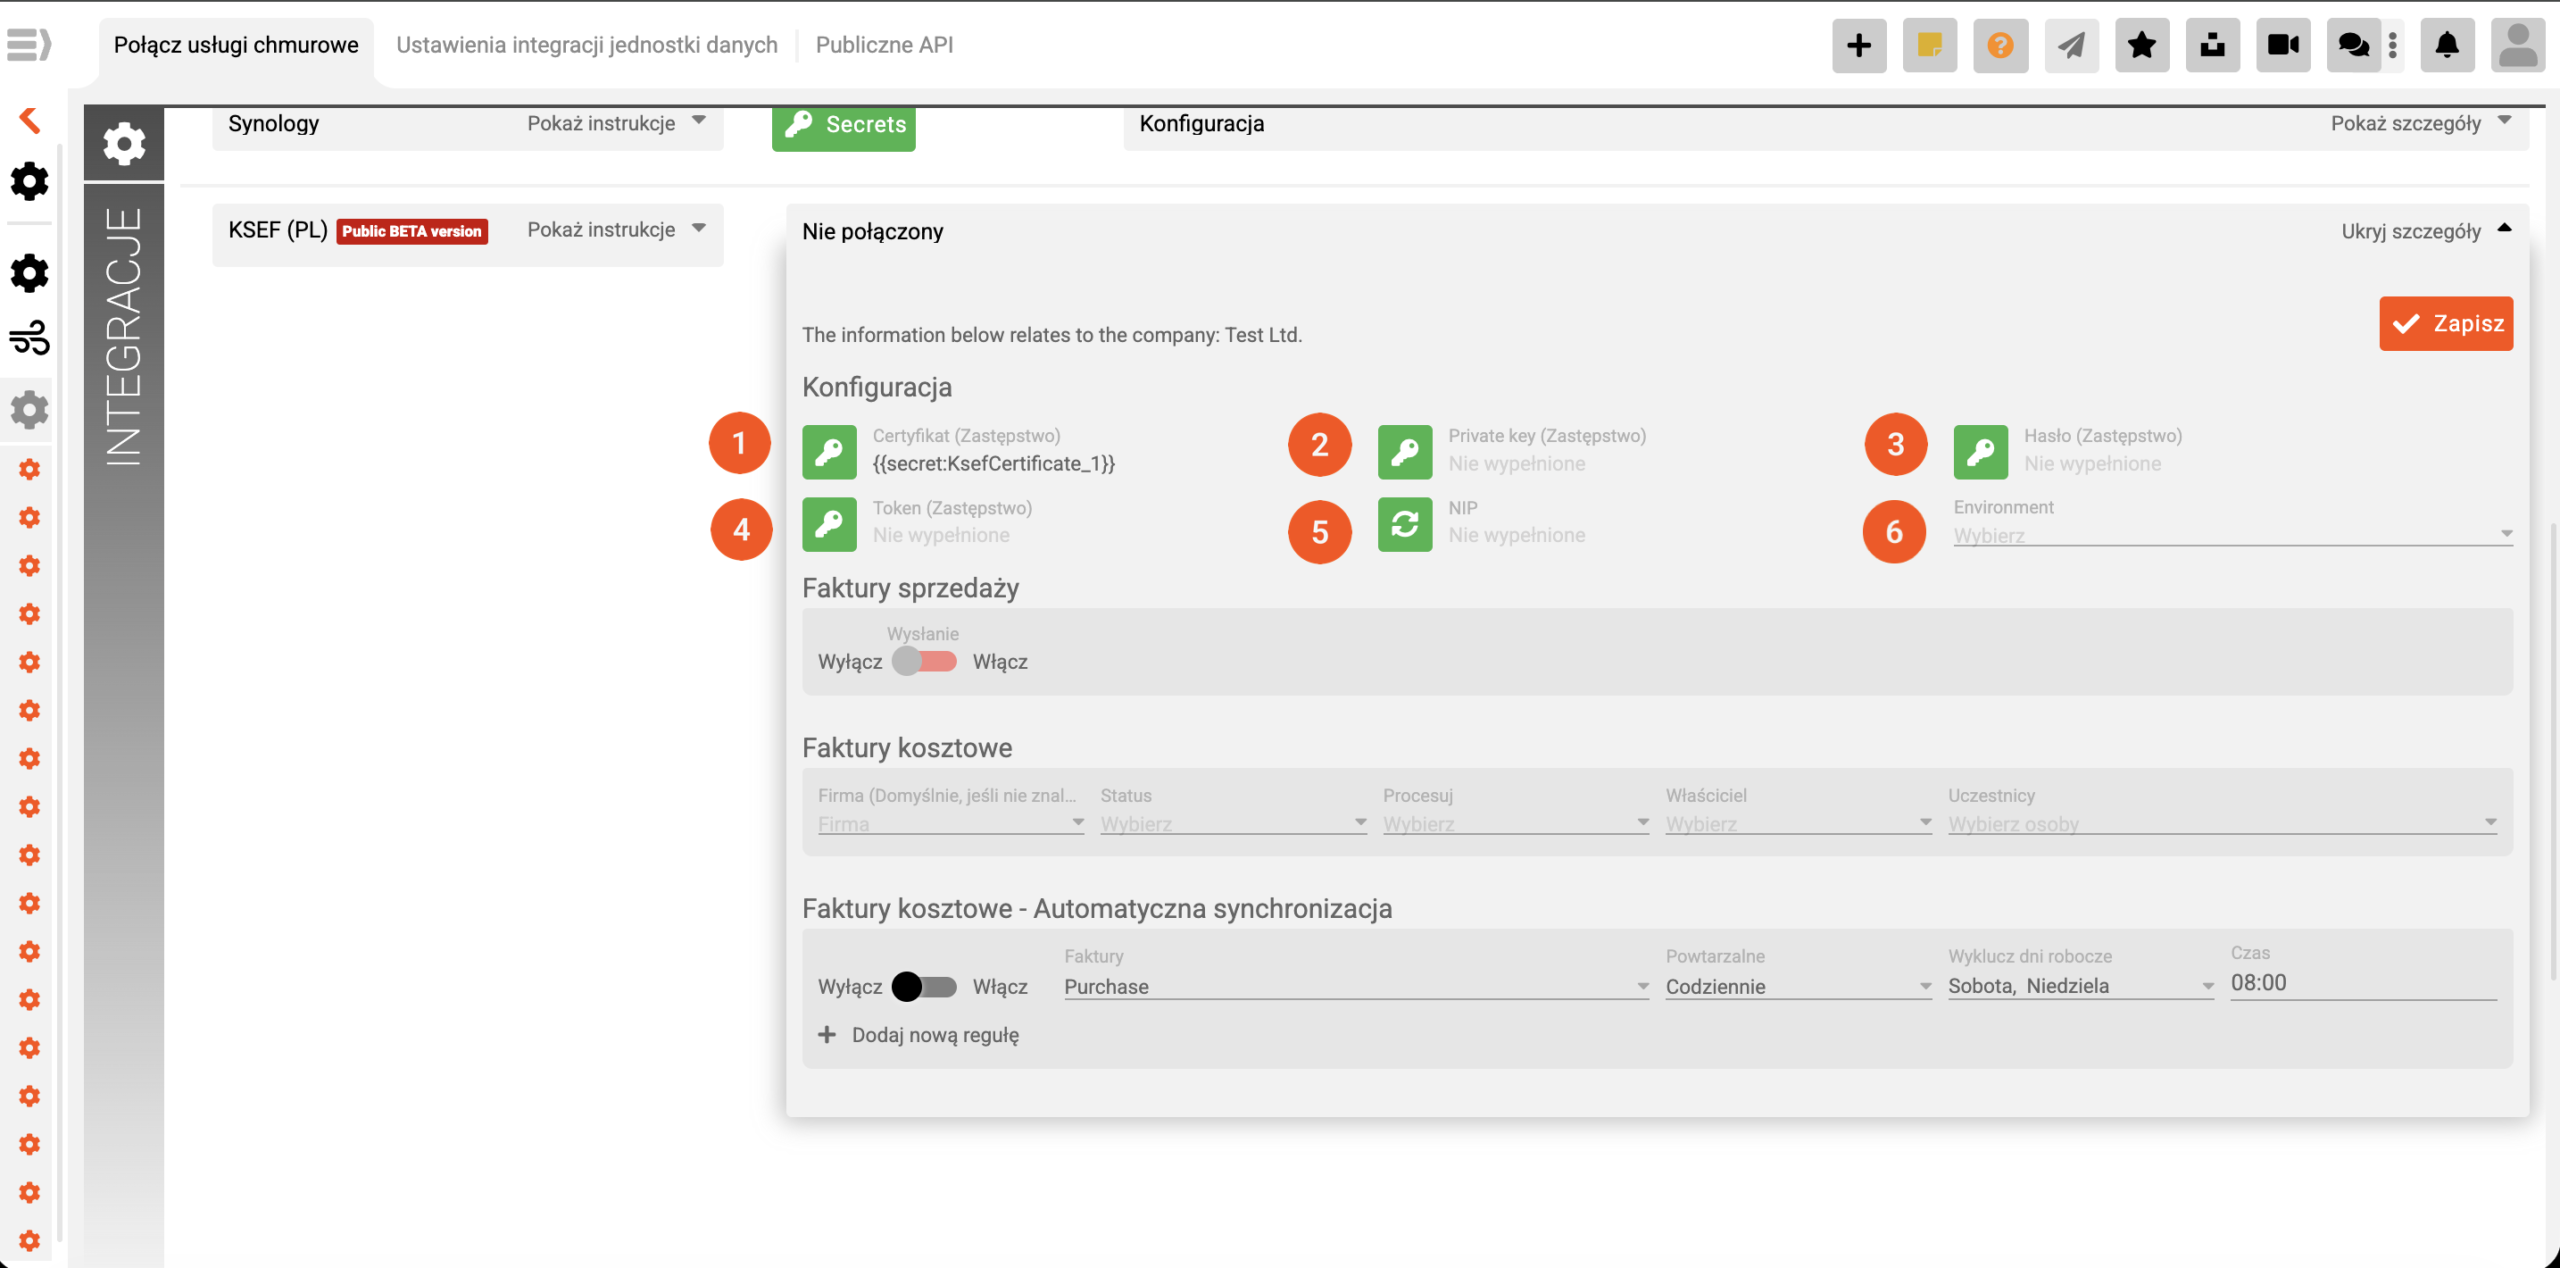
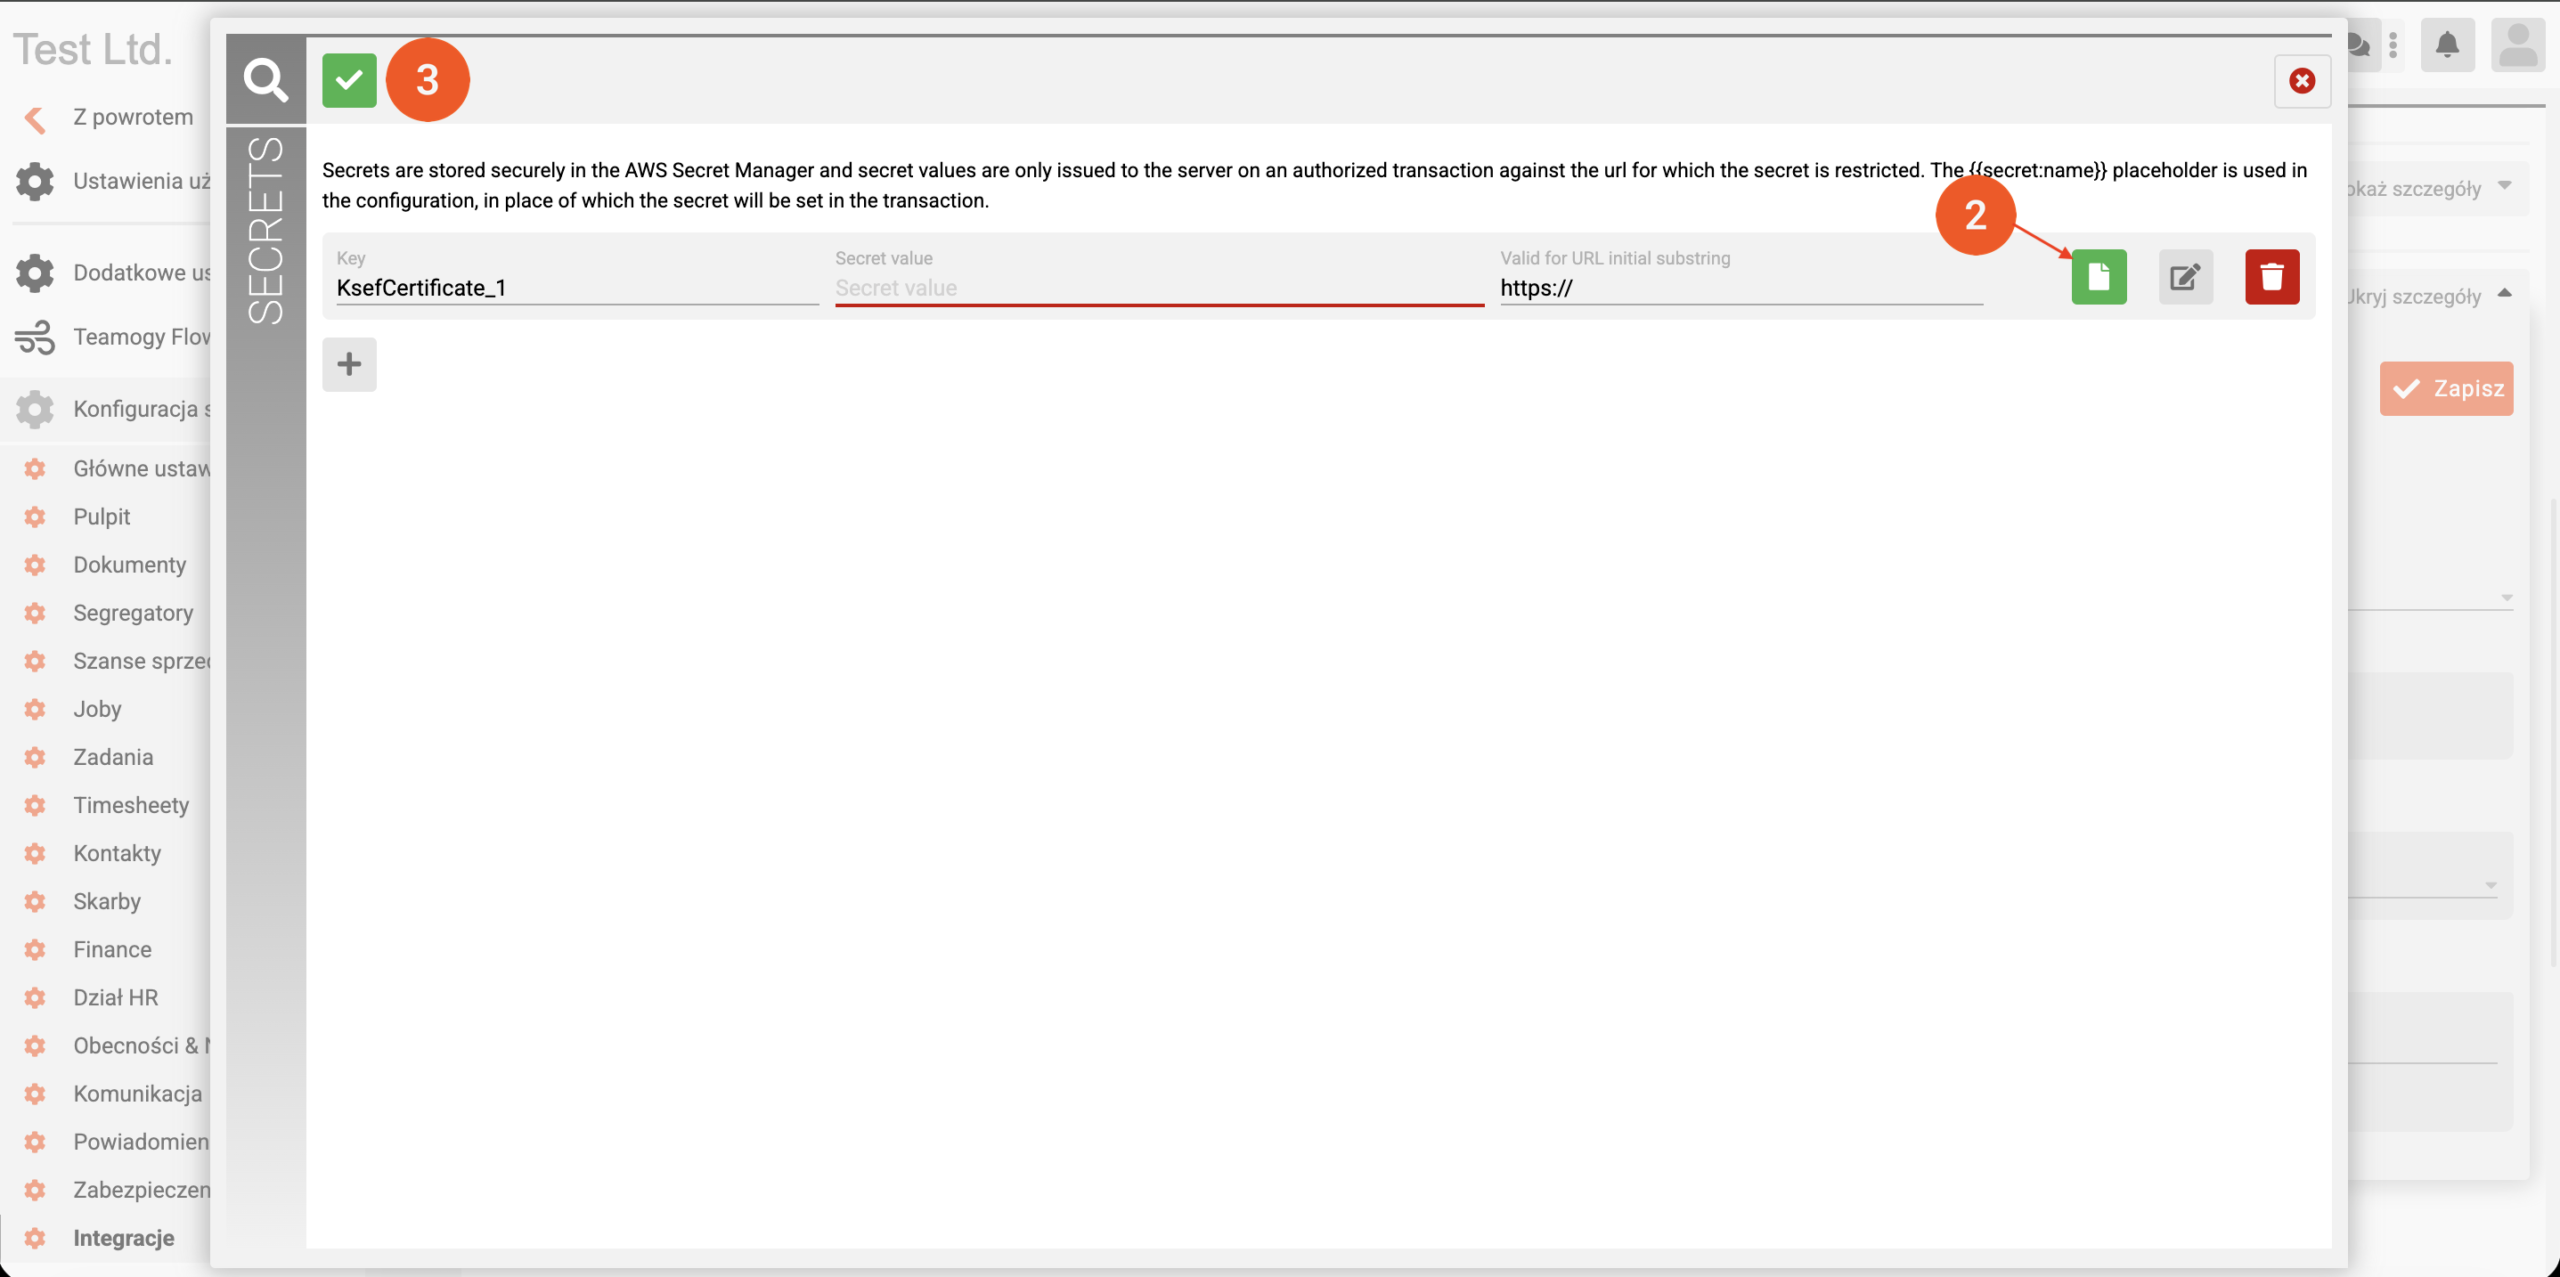
Certificate (1)
– Click the key icon (1) and upload the certificate you received – indicated by the green document icon (2) and save the configuration (3).
Private Key (2)
– Click the key icon (2) and paste the private key you received from the KSeF certification authority into the „Secret value“ field. Save the configuration.
Password (3)
– Click the key icon (3) and enter the password you selected when obtaining the KSeF certificate and private key.
– Enter the password into the “Secret value” field and save the configuration.
API Key (4)
– Click the key icon (4) and paste the API key generated in Teamogy.
– Enter the API key into the “Secret value” field and save the configuration.
NIP (5)
– Click the icon (5) and verify that the displayed NIP number corresponds to the legal entity for which the Teamogy–KSeF communication is being configured.
Environment (6)
– Click the field (6) and select the appropriate environment / company.
Done – Once all required data has been entered, do not forget to save all settings using the Save icon.
Ozvěte se nám
Pokud máte stále problémy nebo potřebujete pomoc, neváhejte kontaktovat Teamogy support. Můžete použít online chat (uvnitř Teamogy nebo kdekoli na www.Teamogy.com v dolním pravém rohu) a dostanete rychlou odpověď.