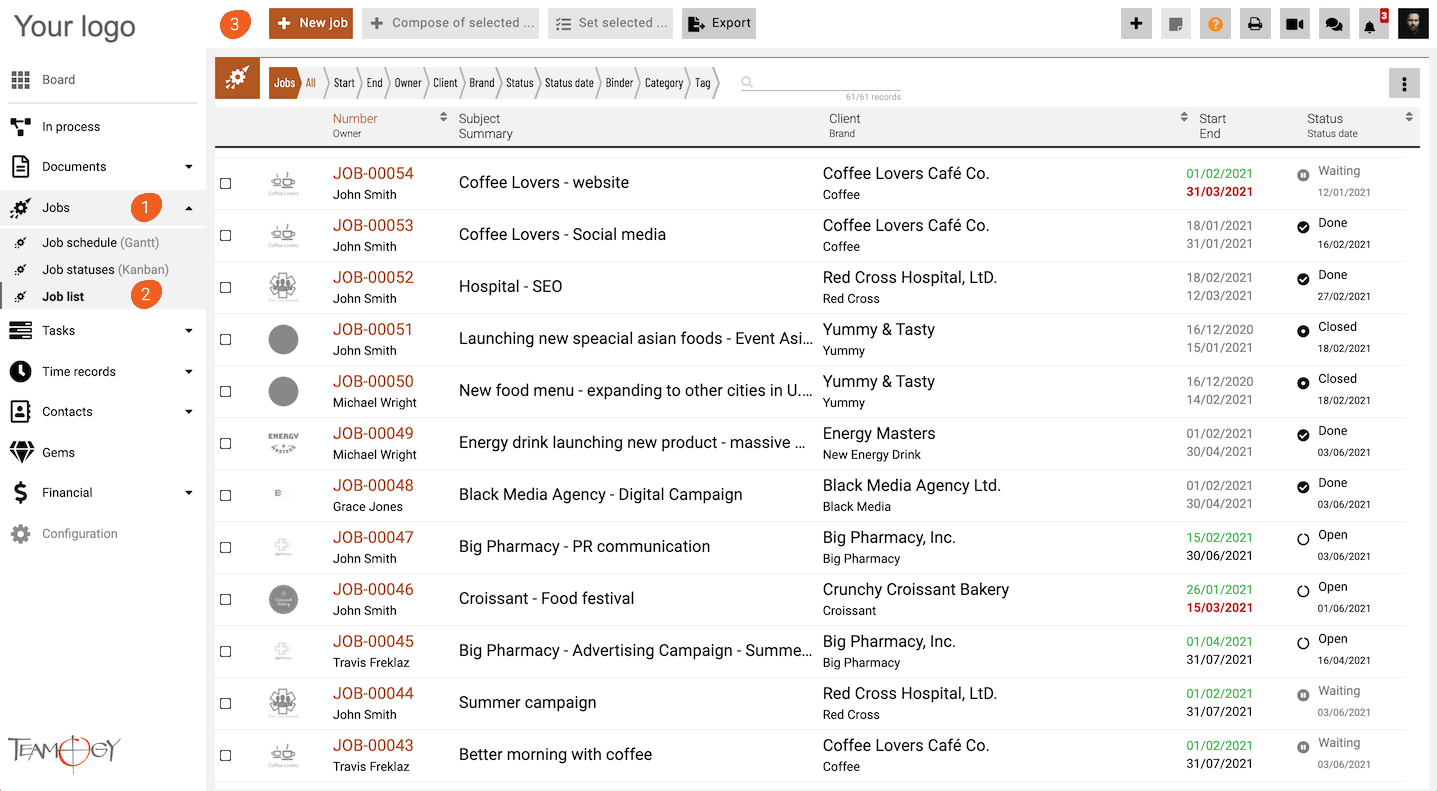
Create A Job
1. In the left navigation menu, unroll Jobs section.
2. Click on the Job schedule (Gantt), Job statuses (Kanban) view or Job list view.
3. Click on the New Job button.
4. Complete all of the details. Mandatory fields are red underlined (can be different from the agency’s settings).
| Subject | simply, it is the name of the Job. Choose the name which best describes the Job. The Job name can also be further visible on related documents, tasks, or time records. |
| Deadline | it is the date when the job should be delivered to the client. Also, the final invoice is usually issued to the client at this moment. |
| Tags | see here how tags can be helpful. |
| Client / Brand | select client and brand (if it’s defined for the client). If you cannot find a client, check to see if it’s created in Companies. If you still have a problem, contact your system administrator or Teamogy support directly. |
| Status | status shows the progress of the Job. By default, there are 5 basic statuses: WAITING, OPEN, READY, CLOSED, and CANCELED. Statuses can be changed manually or by workflow procedures (in advanced settings). If you would like to add more statuses, contact your system administrator or Teamogy support directly. |
| Closing remarks | you can add remarks that will be shown in Report. |
| Order number | this field will copy the number into the Sales Invoice, Sales Proforma Invoice or Sales Prepayment Invoice automatically, if you create it from the Job. Note: Order number is switched off in DEFAULT |
| Notes | document all the important milestones, comments, and reminders that you want to keep visible during work on a job. |
5. After filling in details press SAVE button.
6. Perfect, your first Job has been created.
Get in Touch
If you have problem or need further assistance, do not hesitate contact Teamogy Support. Use online chat (inside Teamogy or everywhere on www.Teamogy.com in the lower right corner) and you will get prompt reply.


