How to edit Dashboard
We will take a look on how to change and customize the Dashboard – homepage of Teamogy. You have option to add/remove new page, edit current page or add new clips (time, notes, link…)
First step – How to activate option to edit Dashboard
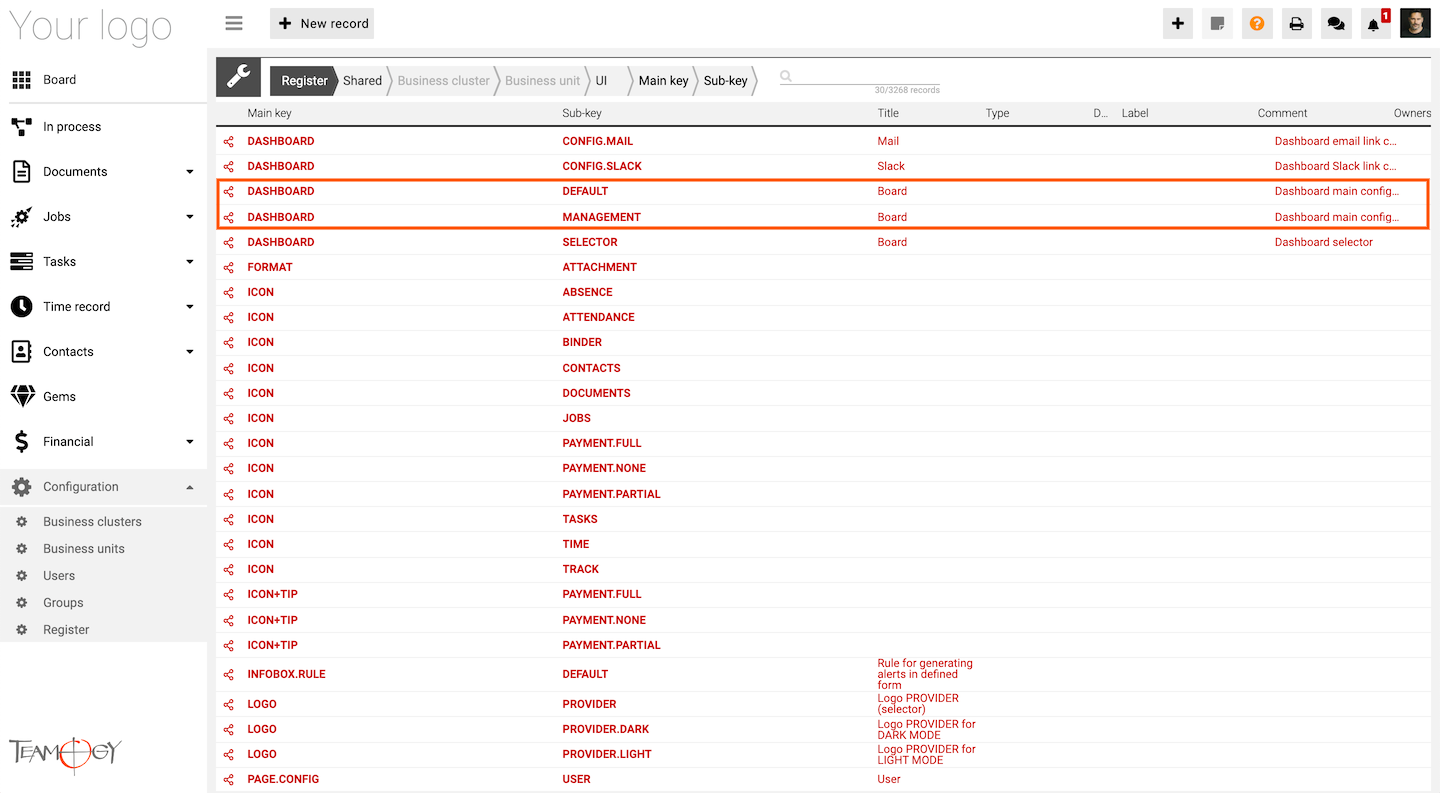
1. Go to Configuration/Register.
2. Use breadcrumb Category to search – UI and click on that.
3. Find two registers – DASHBOARD – DEFAULT and DASHBOARD – MANAGEMENT. You have to change both of them because there are 2 types of Dashboard in the system.
4. Click on the register DASHBOARD – DEFAULT.
5. Click on the Clone button to clone the register.
6. In the new clone register you have to change two things.
First, In the row number 2 you can see:
“userEditable”: false,
Change one word from false to true, after the change the row number 2 will look like this:
“userEditable”: true,
Second, unmark option Shared in the register.
Click on the SAVE button and your new register is created!
Check the GIF below to see the sixth step on how to change the new register.
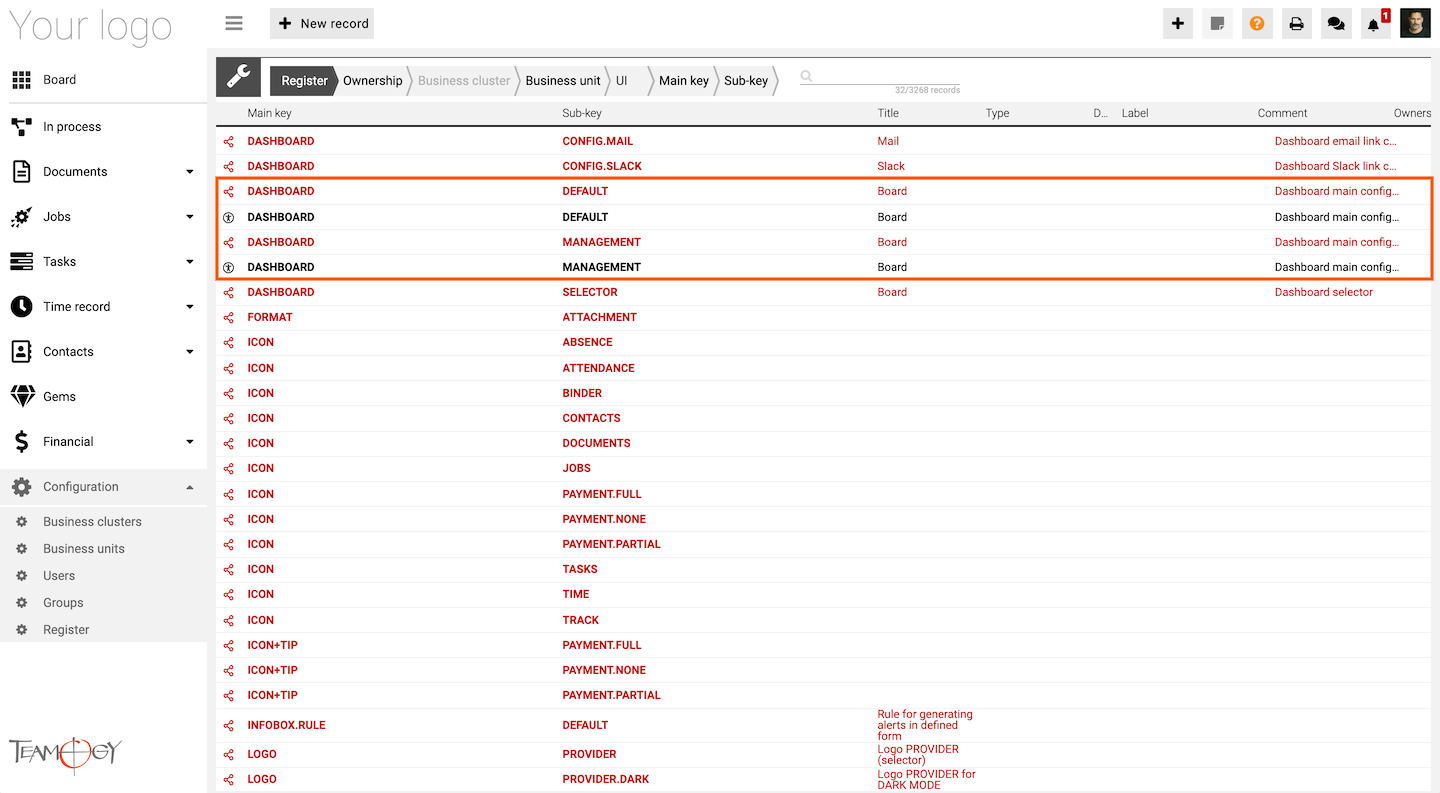
7. Do not forget to change the second register DASHBOARD – MANAGEMENT. It has same steps as DASHBOARD – DEFAULT.
8. After you create two new registers, you will see two shared(red) and private(black) registers about Dashboard.
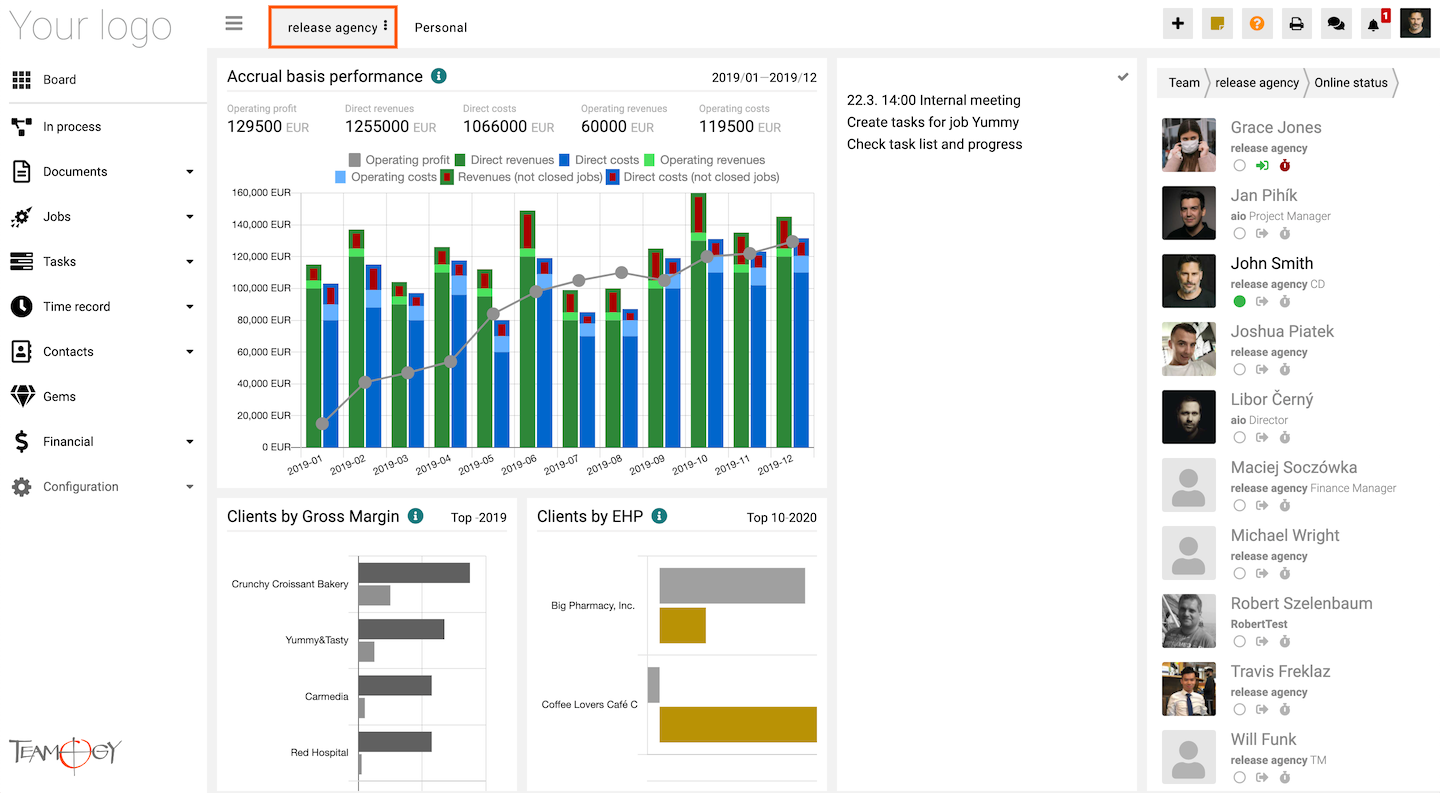
After the change in the registers, you will be able to edit Dashboard. You will see three dots next to the name of the page.
Second step – How to edit Dashboard
1. Click on the three dots and you have many option to edit Dashboard.
Add new page – It creates new page (tab) in Dashboard
Delete current page – It deletes current page that you look at the moment.
Reset dashboard to default – It restores the Dashboard to default.
Add new clip – You can add new clip like Time, link, notes and so on.
Edit current page – It will switch you into editable mode in Dashboard
Let’s take a look what you can edit in Dashboard.
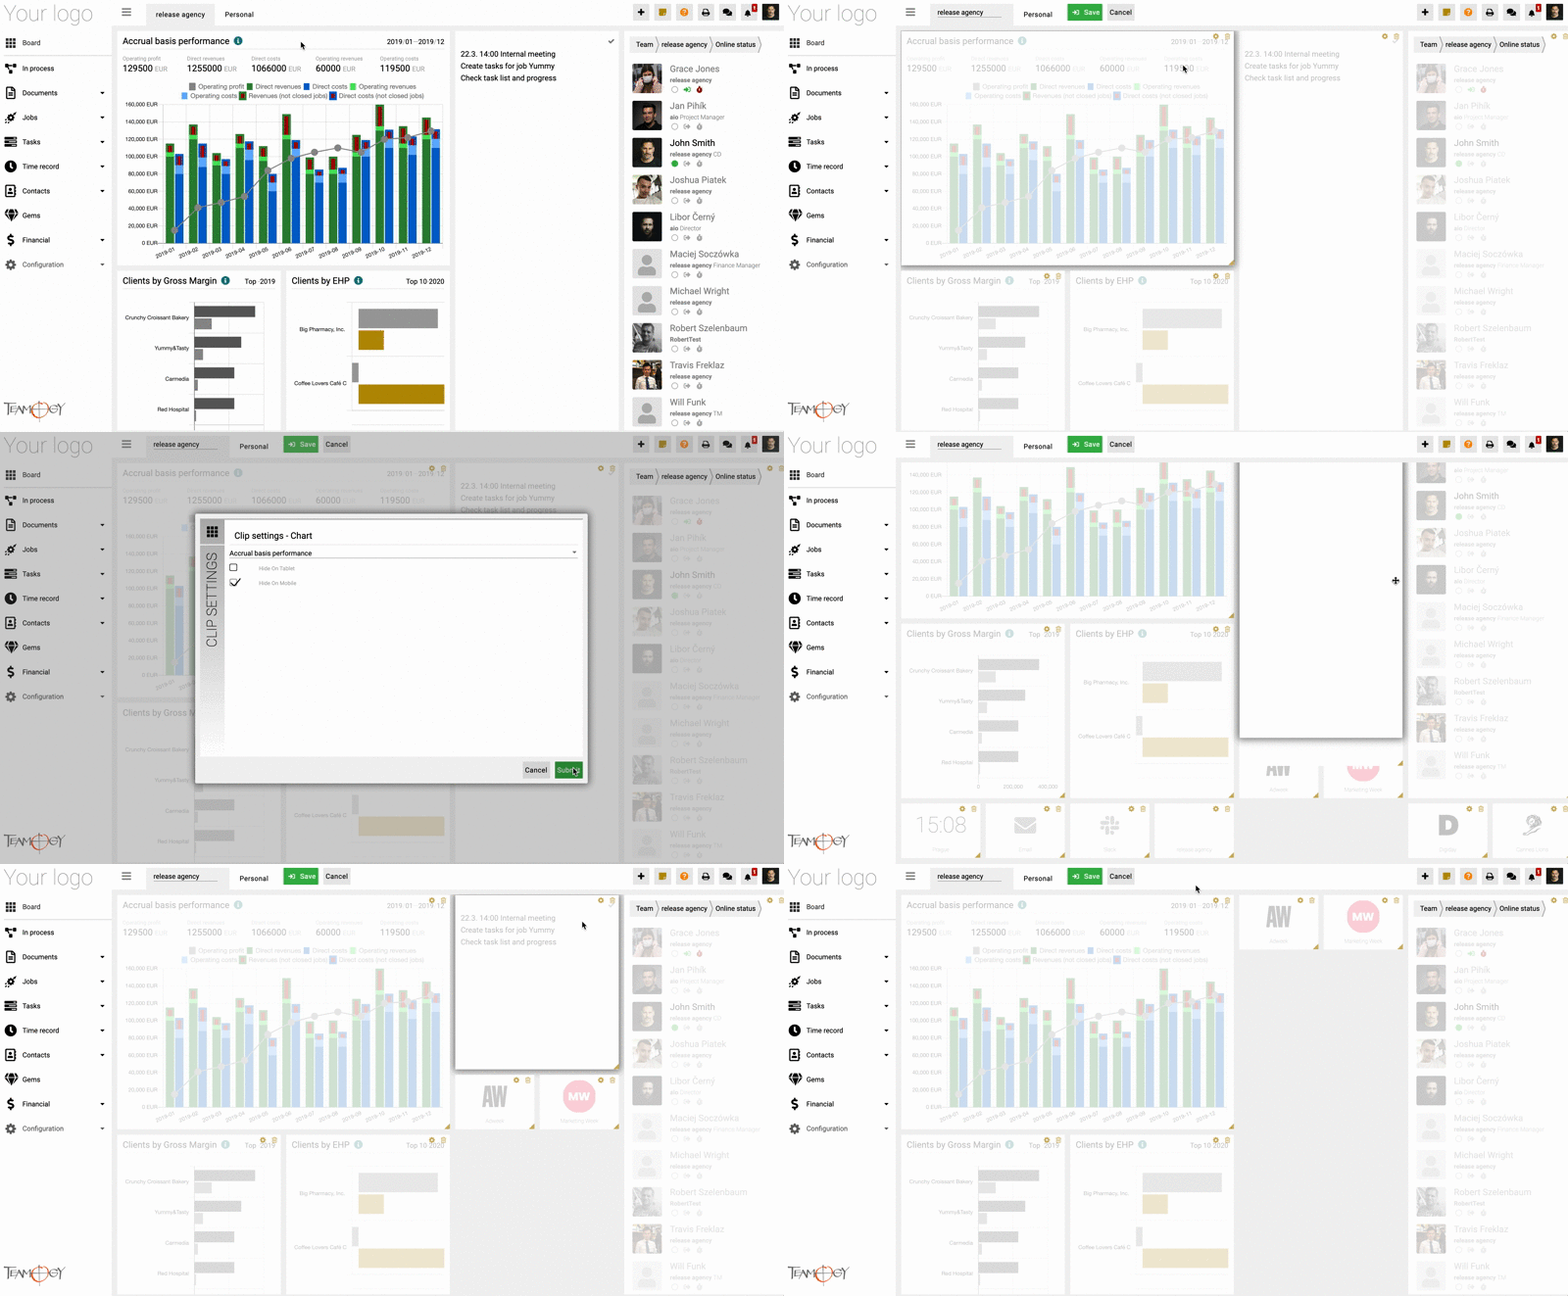
If you click on the option Edit current page, you will have option to change the size of the current clips. You can also delete the clip or you can set whether the specific clip will be displayed on the mobile and tablet or not.
If you want to add new clip, just click on the option – Add new clip and choose one of the option – Time, iFrame, Link, Notes, Poster, Team, Email, Slack or Chart.
Check the GIF below how to add a new clip – Link. Click on the option – Add new clip and choose the option Link and press SAVE. After the SAVE, editable Dashboard will open and you will see the new clip – Link to the Online gallery. Change the Online gallery to your specific link. Edit the line URL name and URL. You can also have the option to choose whether it will be shown on tablet and mobile or not. Press SAVE button and your new link has been added to the Dashboard.
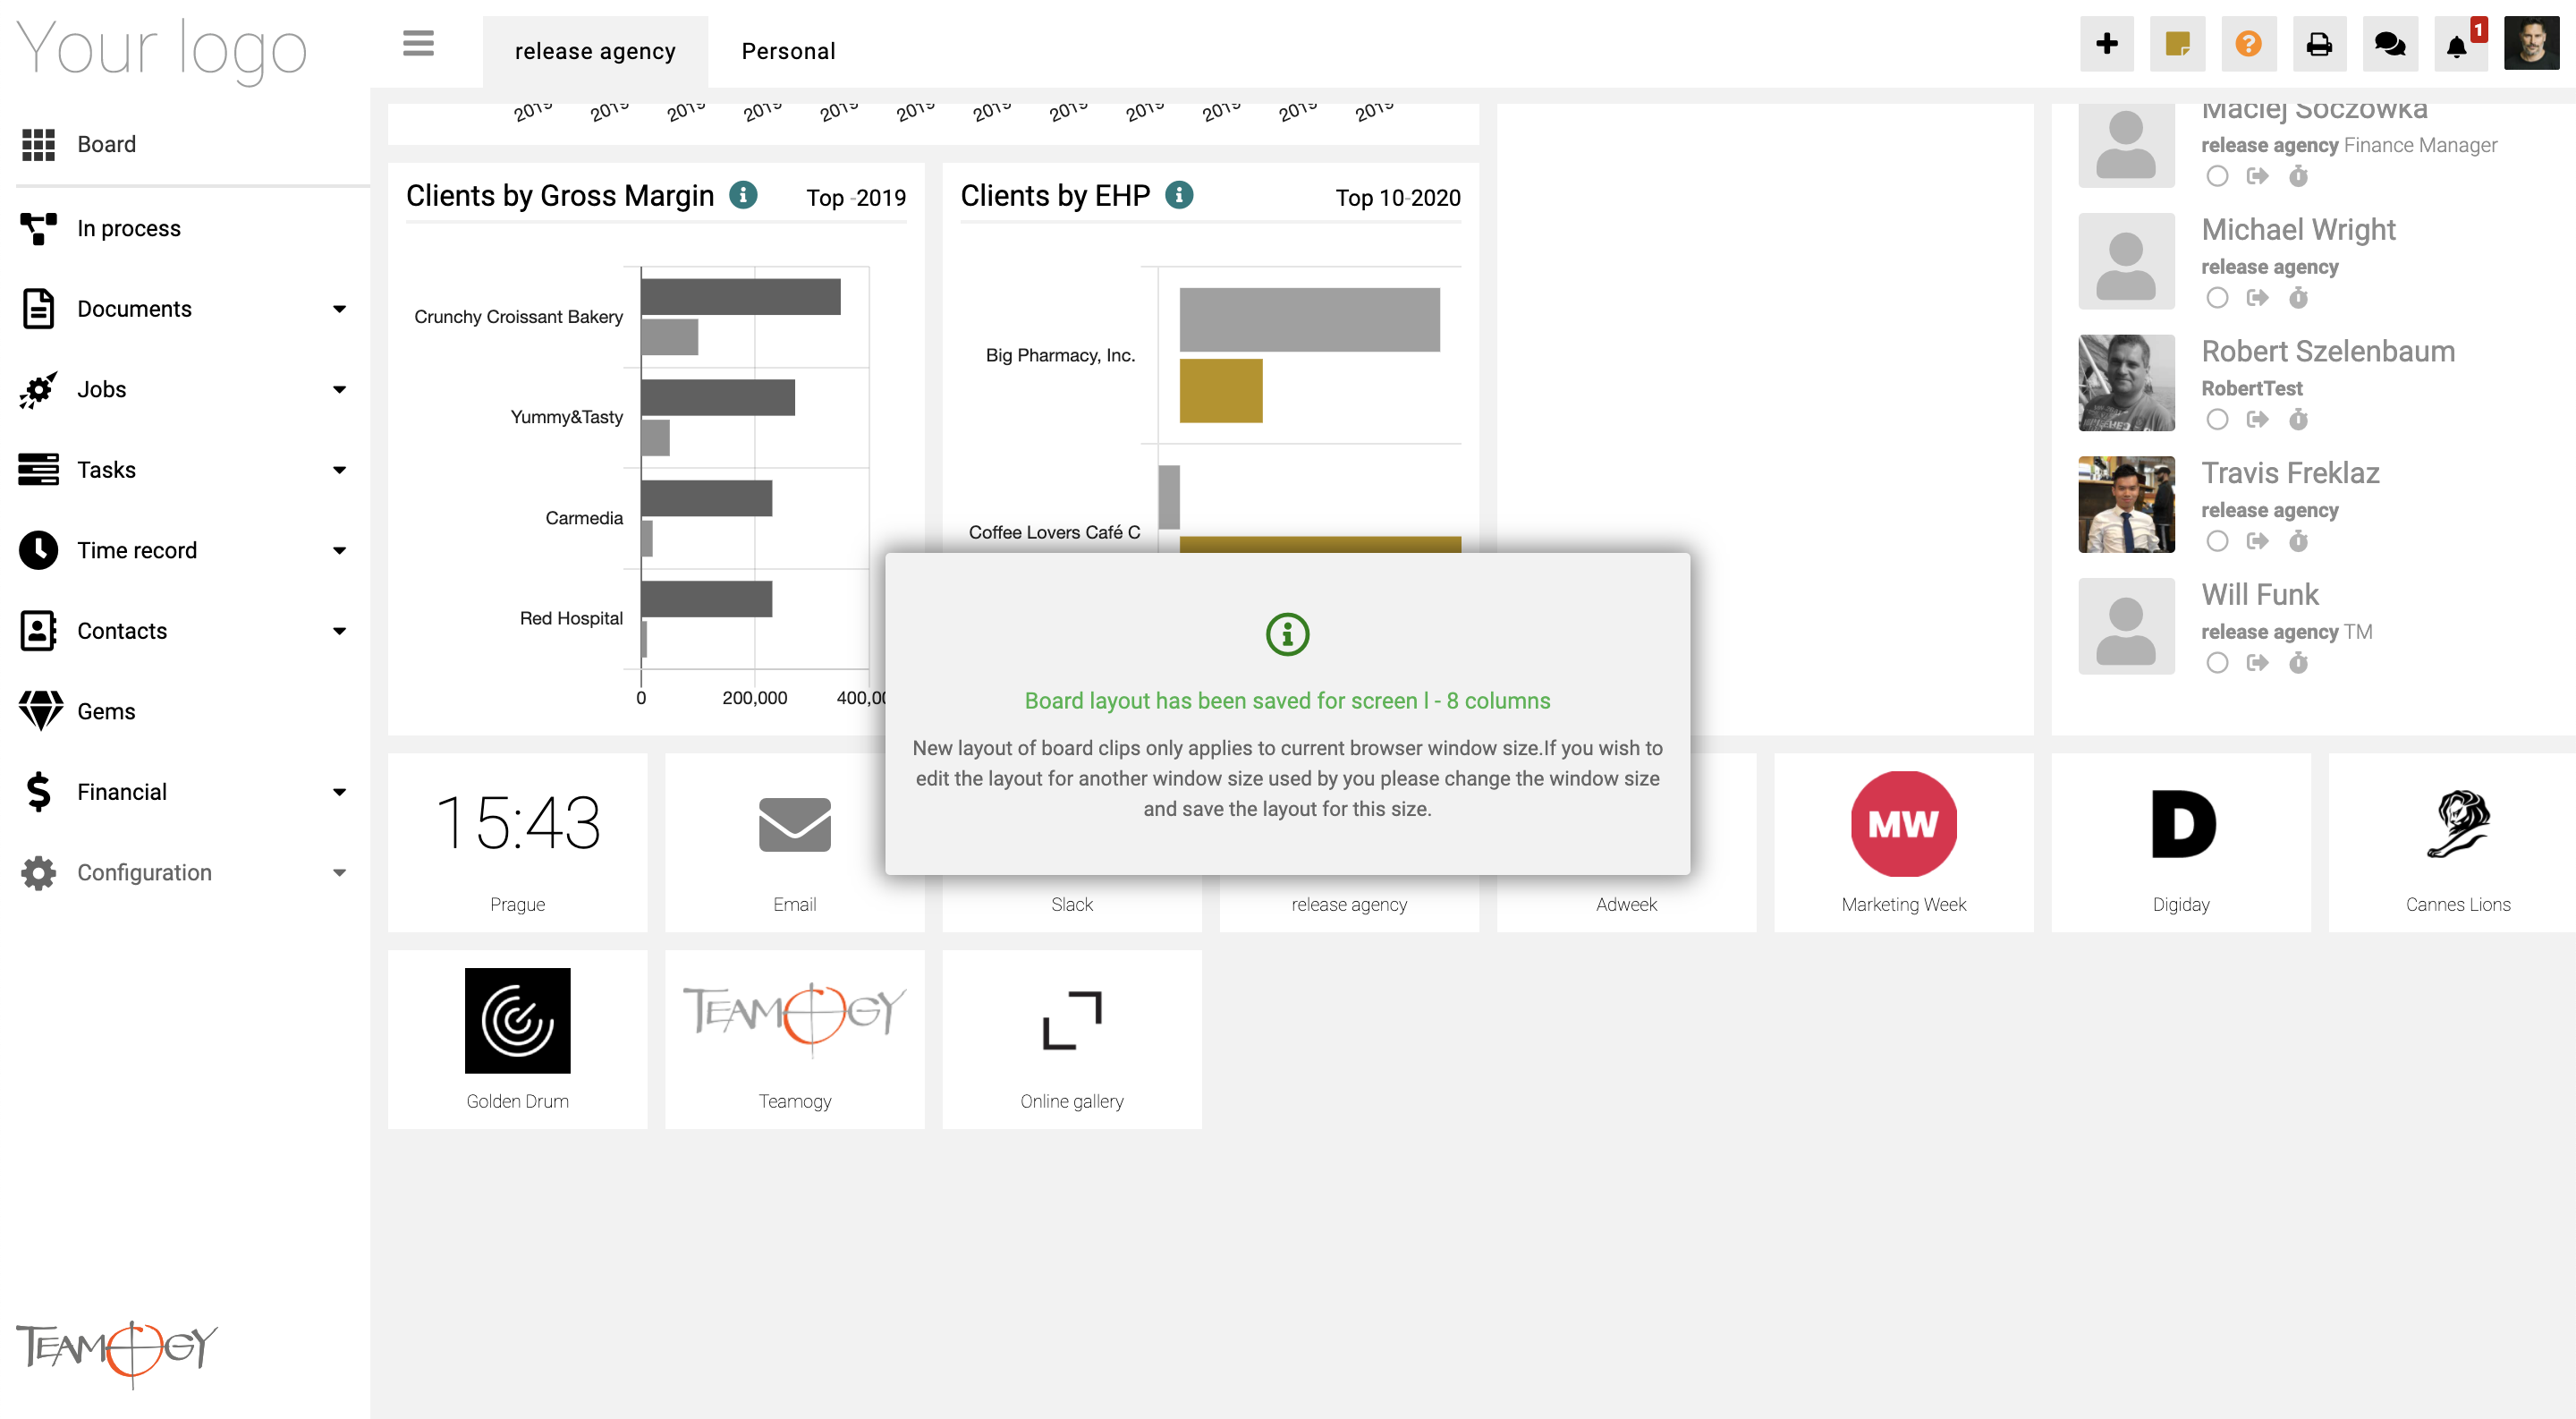
After the SAVE you will notify o message – that your Dashboard was modified for screen X columns, in my case for 8 columns.
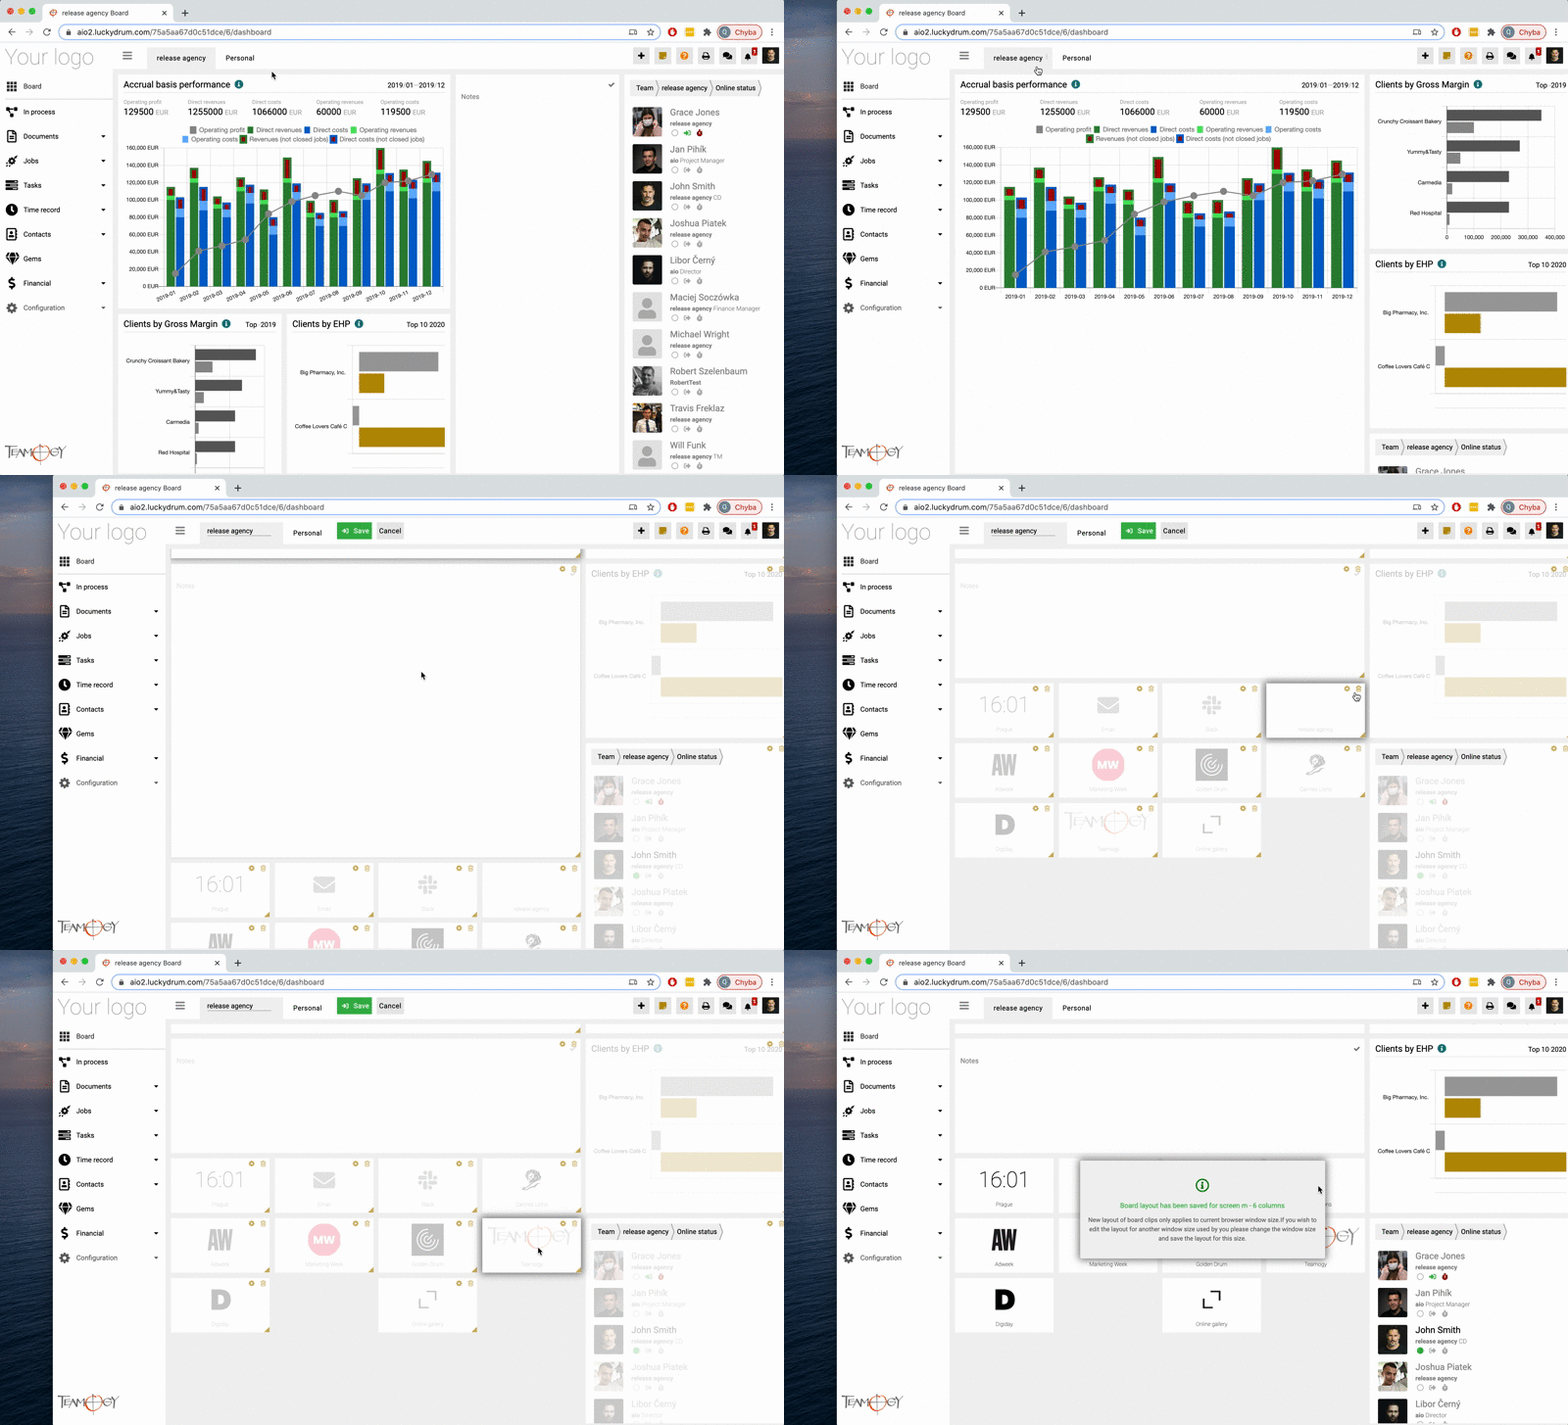
It means that your new saved Dashboard only applies to your current browser window size and you should edit the layout for another window size used. Check the GIF below on how to edit the Dashboard for another window size.
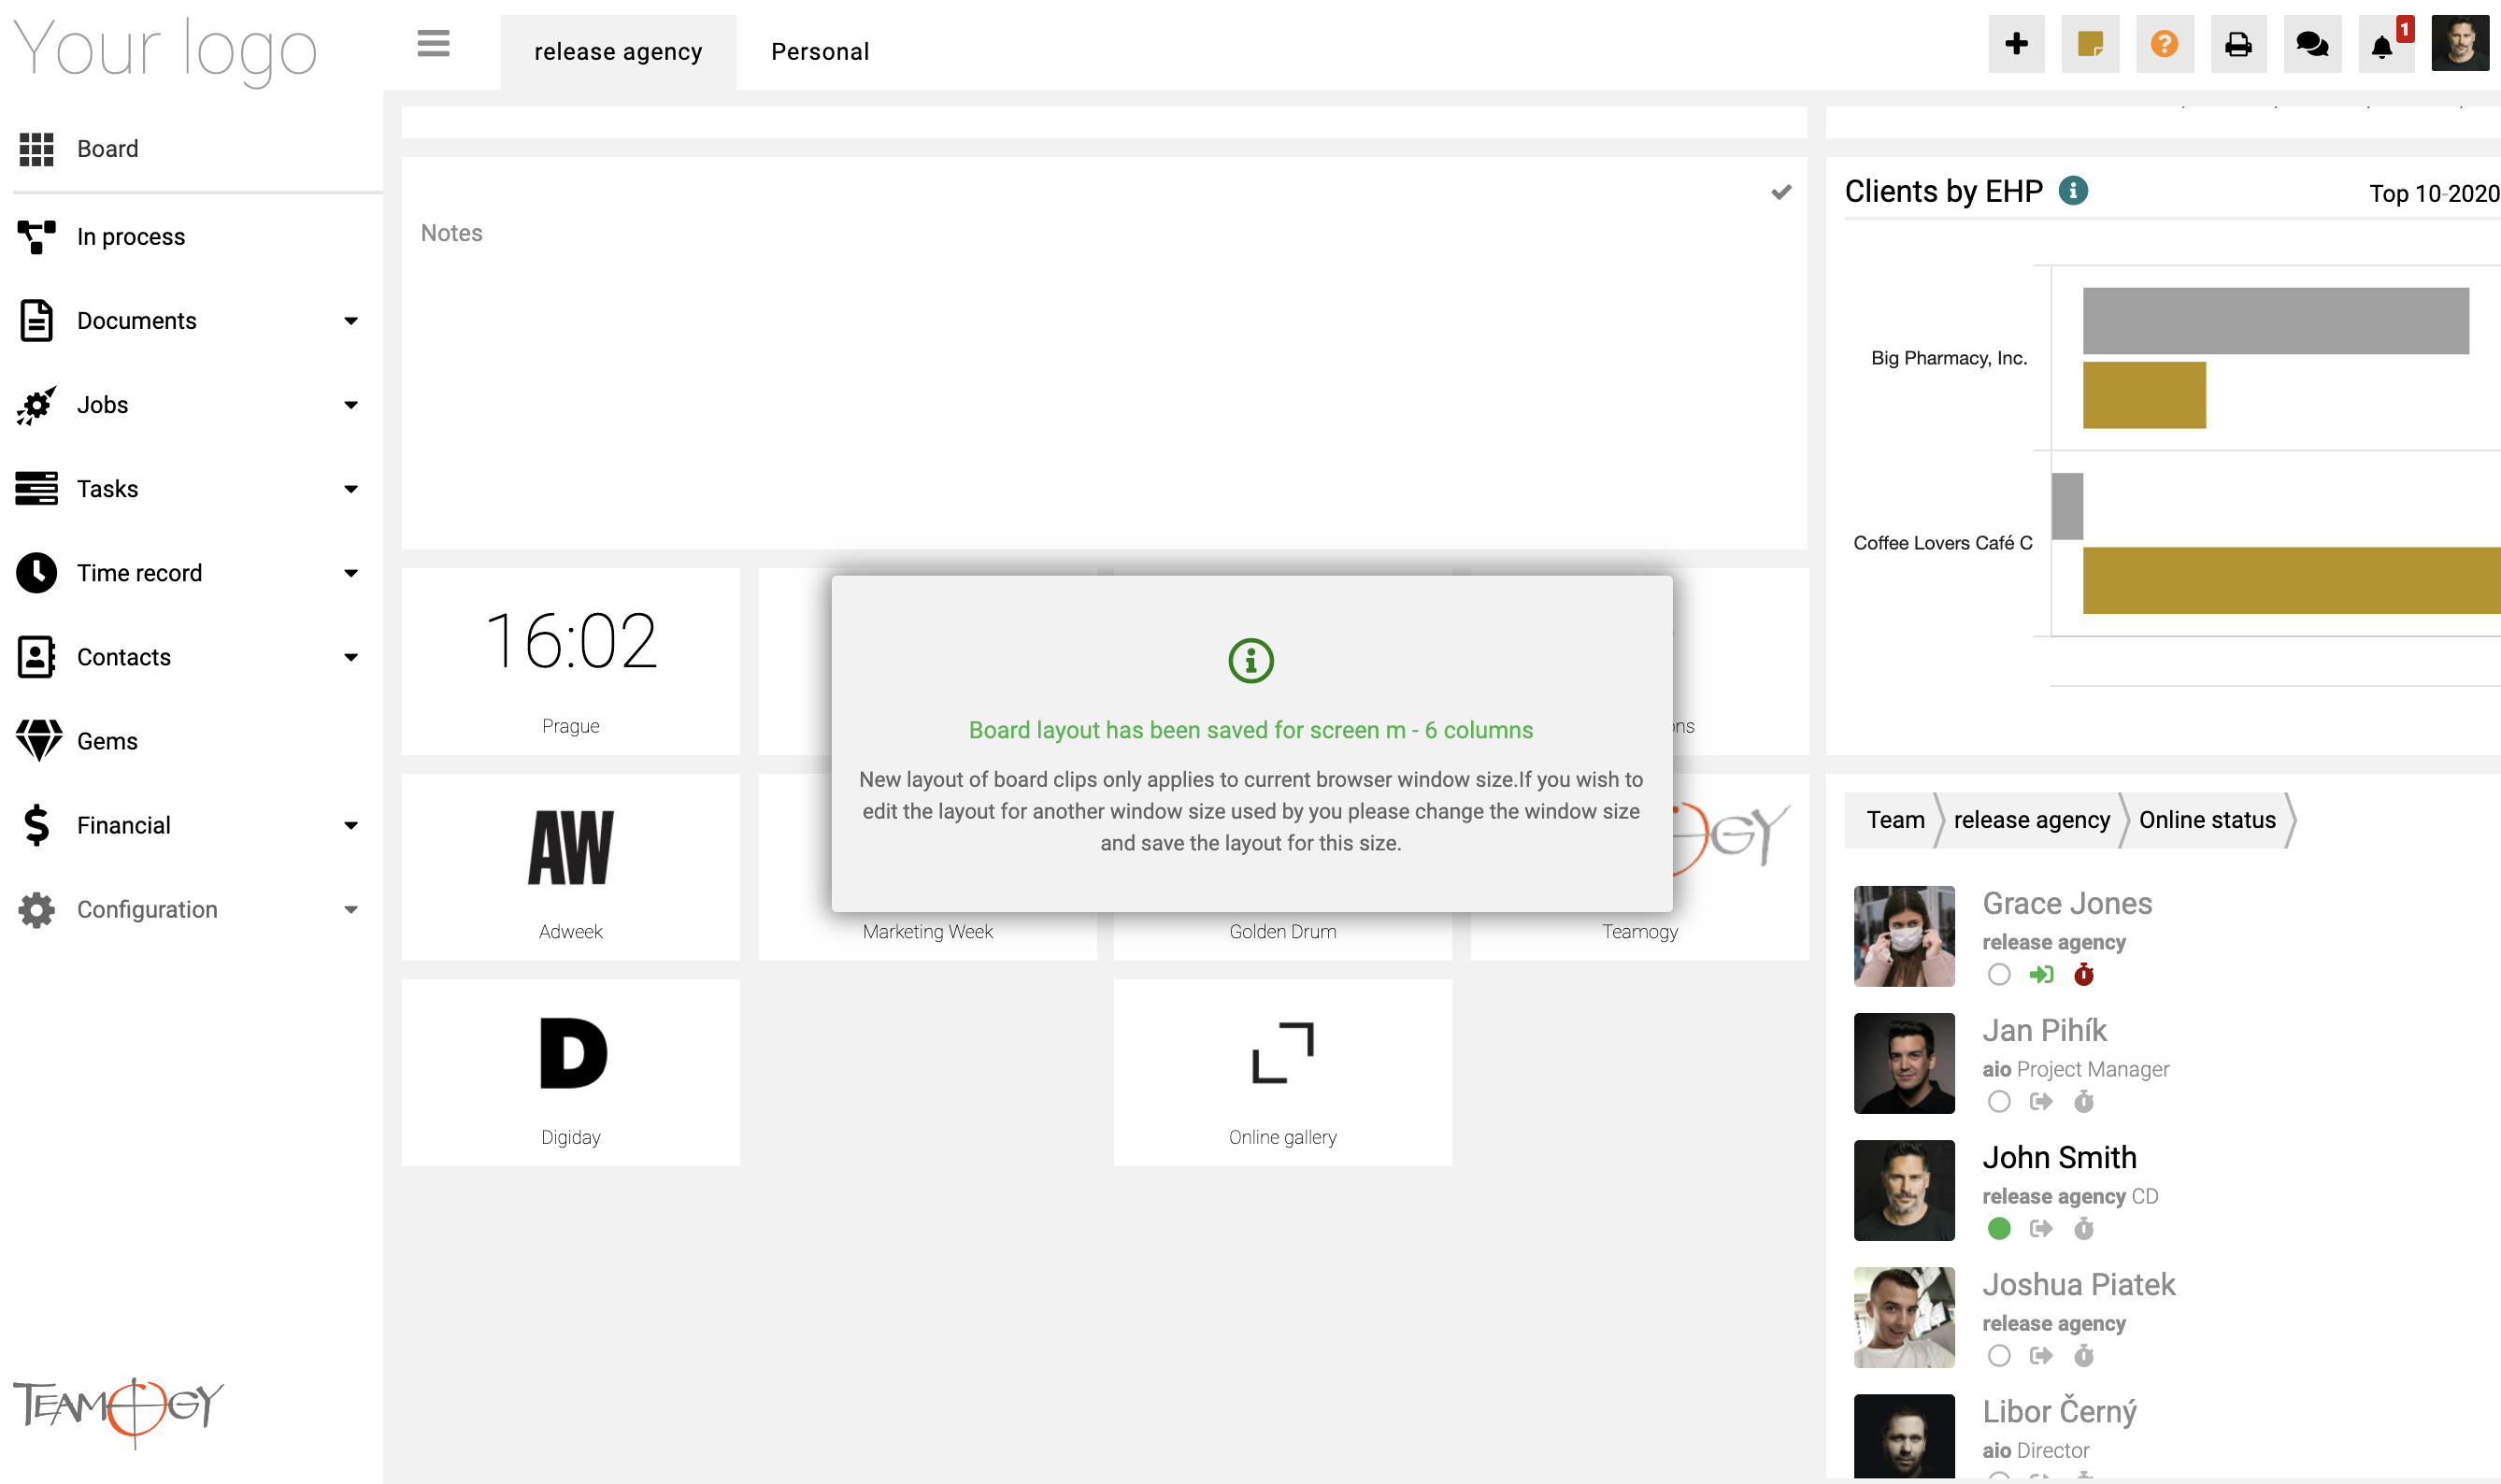
Now we have saved the board layout for screen – 6 columns. You can also change the board layout for 2, 4 or more columns. Just change the window size and edit the board layout as you please.
Get in Touch
If you have problem or need further assistance, do not hesitate contact Teamogy Support. Use online chat (inside Teamogy or everywhere on www.Teamogy.com in the lower right corner) and you will get prompt reply.
