Create a Sub-task
1. Open the Task for which you want to create a Sub-task.
2. Click on Sub-task.
3. Complete all Mandatory details (can be different, depends on company’s settings).
4. Press SAVE.
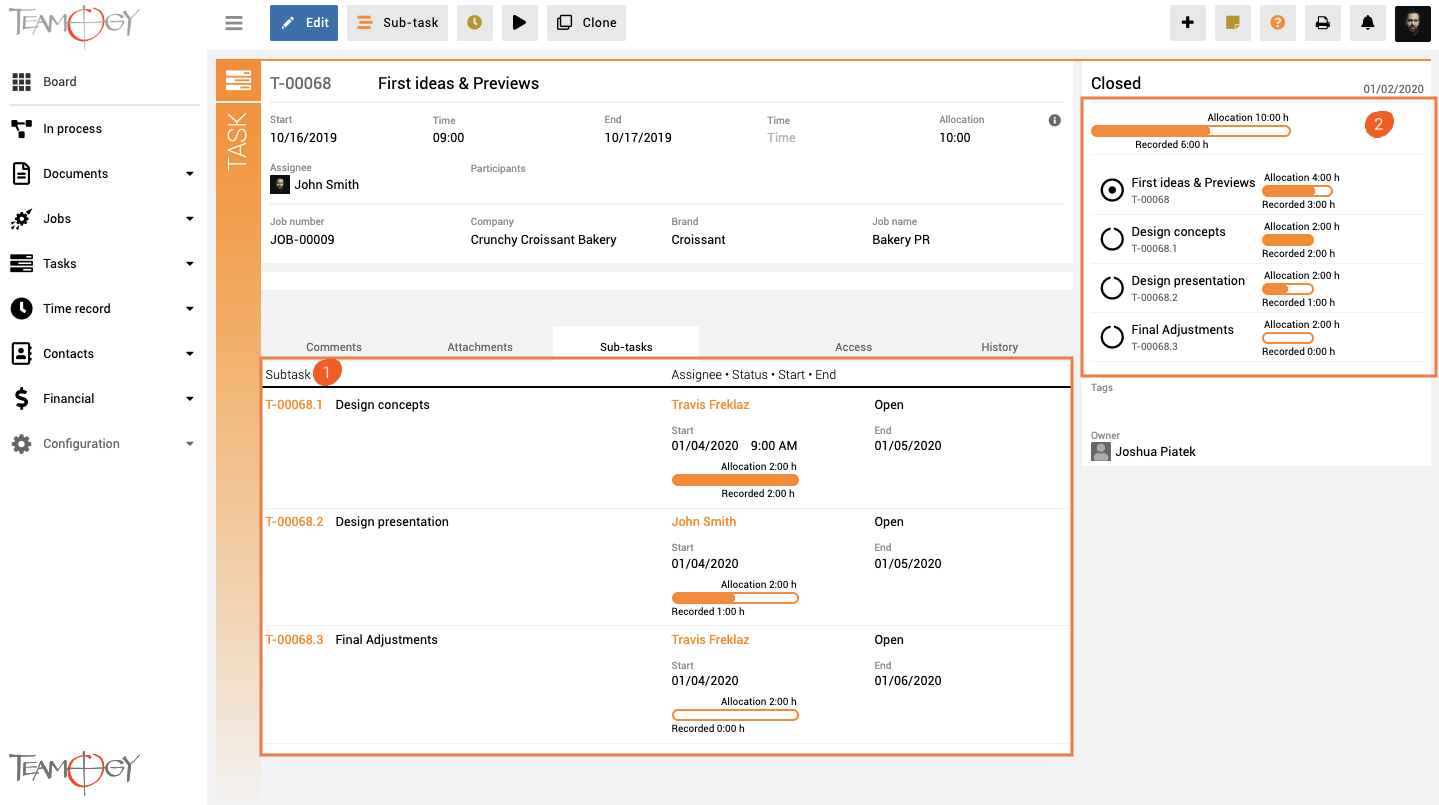
Below we describe the Sub-tasks and their values in the main Task.
PART 1: Here you can see all of your created sub-task including Sub-task’s number, allocation, recorded hours, Assignee, status, as well as start and end of Sub-task.
PART 2: This is the sidebar of your Task. You can see both the overall Task allocation and the individual allocation of Sub-tasks including already reported hours. The first progress bar shows the overall allocation of the whole Task – it’s the sum of the main task and individual Sub-tasks allocations and reported hours. Other progress bars shows the progress of main Task and individual Sub-tasks separately.
[Sub-task’s allocation reduce the allocation of the main Task. For more detailed information click here.]
Get in Touch
If you have problem or need further assistance, do not hesitate contact Teamogy Support. Use online chat (inside Teamogy or everywhere on www.Teamogy.com in the lower right corner) and you will get prompt reply.